
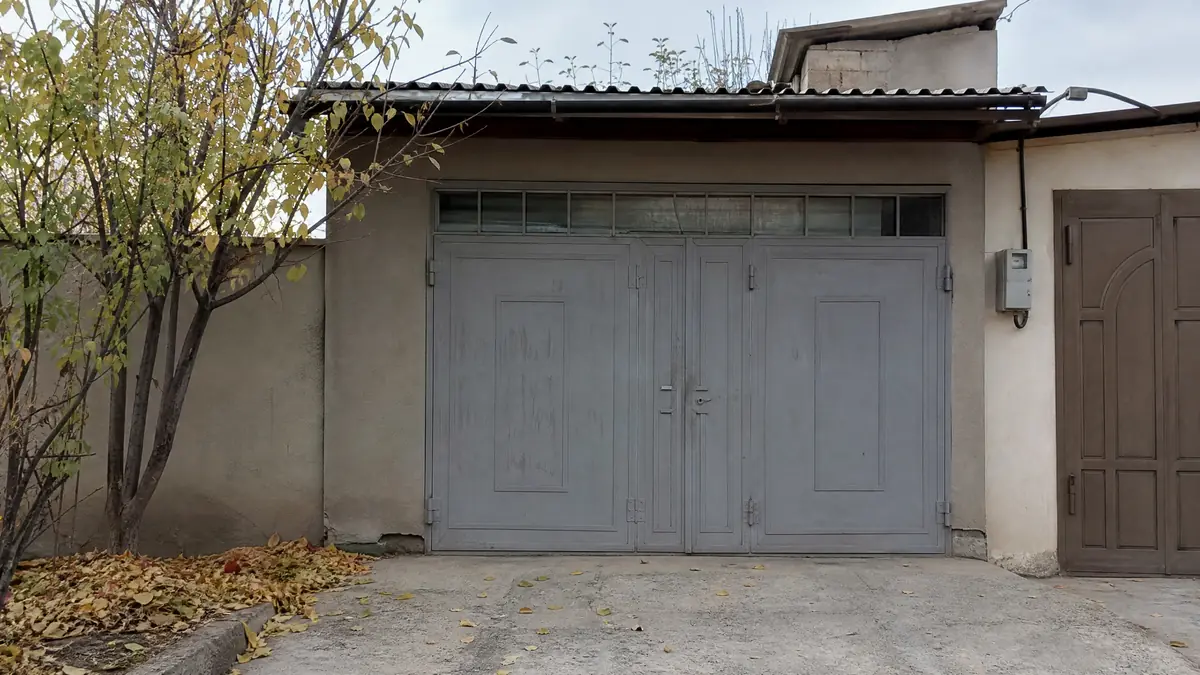
Garage Photos in Autumn: Roof, Doors, and Details
Selling a garage in autumn? Show more than just the doors: include the roof, ceiling, walls, and floor. Learn how to choose the right lighting, avoid glare after rain, and prepare photos that help buyers assess the property's condition.
Why Proper Garage Photography Matters in Autumn
To help buyers assess a garage from photos, show more than just the overall exterior. Include the roof, doors, walls, ceiling, and floor. In autumn, it is especially important to account for overcast skies, wet surfaces, fallen leaves, and early dusk. These conditions can obscure details or make areas appear defective when they are not.
When selling a garage in Uzbekistan, the seller's goal is to give potential buyers a clear understanding of the property before an in-person visit. Good photos do not replace an on-site inspection, but they help buyers assess visible features in advance and prepare specific questions.
How to Prepare a Garage for Photography
Before taking photos, remove unnecessary items from the frame, ensure access to the doors, and inspect the surfaces. You do not need to carry out major renovations just for a listing. It is much more useful to show the garage's actual condition and present its advantages neatly.
What to Do Before Taking Photos
- Remove leaves, boxes, and unnecessary items from the area in front of the doors.
- Clear access to the walls, corners, and areas where signs of moisture are visible.
- Check whether the doors can be opened safely and photographed from the inside.
- Move items that completely block the ceiling, floor, or walls.
- If the surfaces are wet after rain, wait for them to dry if possible so you can distinguish permanent marks from temporary moisture.
- Prepare your phone: clean the lens and check that you have enough free storage for the photos.
Do not conceal cracks, stains, corrosion, or other noticeable features. If there is a problem area on the roof, it is better to photograph it from a safe position and describe it in the listing than to create a false impression for the buyer.
How to Photograph the Garage Roof
To show the roof's condition, take an overall photo of the roofing from an accessible, safe vantage point, then photograph any visible defects more closely. Supplement the exterior shots with photos of the ceiling and upper sections of the interior walls, if they are accessible for inspection.
Which Angles to Choose
- Roof exterior. Photograph the entire accessible roof area so buyers can understand its shape, covering, and visible damage.
- Edges and joints. Separately show connections, roofing edges, and visibly damaged areas that can be seen from the ground or another safe position.
- Interior ceiling. Photograph the entire surface, then take close-ups of stains, discoloration, peeling, or other suspicious areas.
- Upper walls. Show the junctions between the walls and roof if there are signs of dampness, cracks, or damaged finishes.
Do not climb onto the roof for a more impressive shot if doing so is unsafe. A photo taken from the ground or an accessible opening is better than a risky angle. If trees, neighboring structures, or an awning partially block the roof, choose a different shooting position and indicate which areas could not be inspected visually.
Autumn leaves can cover roof edges and drainage components. Remove leaves only where it is safe to do so, and do not attempt to clear a high roof without suitable equipment.
How to Show the Condition of the Garage Doors
To help buyers assess the doors, photograph them closed from the outside, open from the inside, and in close-up around the joints, locking mechanism, and mounting points. These shots help buyers understand the construction and identify visible signs of wear.
Four Useful Photos of the Garage Doors
- Doors closed, viewed from the front. Position the camera approximately opposite the doors to avoid distorting their shape and proportions.
- Doors viewed from the inside. Show the inner surface, frame, and accessible mounting points.
- Hinges and joints. Take close-ups of rust, damaged areas, misalignment, and other noticeable features.
- Lock and locking mechanism. Show the actual condition of the mechanism without revealing personal keys, codes, or other sensitive information.
If the doors are difficult to open or do not close tightly, do not rely on photos alone. Briefly mention this in the description. A photo shows appearance but does not prove that the mechanism works properly.
How to Photograph the Walls, Floor, and Interior Space
Show the walls, floor, and ceiling so buyers can assess the surfaces and available space. To do this, take both wide shots of the interior and close-ups of important details.
Take one photo looking into the garage from the entrance and, if space permits, another from the opposite side. The photos should clearly show the walls, floor, and ceiling, rather than just the items stored inside.
Pay attention to the following details:
- Cracks and peeling on the walls;
- Stains, discoloration, and possible signs of dampness;
- Uneven areas, damage, and the condition of the floor covering;
- The condition of the ceiling and visible signs of leaks;
- Ventilation openings and other noticeable structural features;
- The actual width of the opening and the space in front of the doors, if these are important for using the garage.
Do not correct the perspective in a way that makes the space look significantly larger than it really is. A phone's wide-angle mode can distort proportions, so supplement the wide shot with regular photos that have a more natural perspective.
How to Use Autumn Light
Choose a time when the main surfaces are clearly visible and the lighting does not create deep shadows. In overcast weather, soft light often helps you photograph doors and walls without harsh differences in brightness.
If you take photos after rain, watch out for reflections on metal and wet floors. Glare can hide scratches, rust, and uneven surfaces. If possible, wait until the surface becomes less shiny or slightly change the shooting angle.
Do not photograph the entire garage against a bright sky: the doors and interior may turn out too dark. If the interior is dim, switch on the available lighting and take a separate photo in daylight. Avoid excessive filters that change the color of the metal, walls, or roofing.
It gets dark early in autumn, so do not leave photography until the last few minutes before sunset. Clear, neutral photos are better than trying to compensate for insufficient light through editing.
How to Arrange Photos in the Listing
Arrange the photos in an order that helps buyers inspect the property step by step: start with the overall exterior, then show the doors, roof, interior, and details of the condition.
Recommended sequence:
- The entire garage from the outside, including the doors and surrounding area.
- The doors from the front in the closed position.
- Close-ups of the doors and their mounting points.
- The exterior roof from an accessible, safe angle.
- An overall view of the garage interior.
- The ceiling, upper walls, and areas with visible signs of moisture.
- The floor, corners, and other important features.
- An additional photo of the access road or space in front of the garage, if it helps buyers assess access.
Every photo should provide new information. Several nearly identical shots of the facade cannot replace one clear photo of the ceiling or the inside of the doors.
Post Your Listing on BRIX for Free
To present your garage to potential buyers, prepare your photos and post a listing in the brix.uz/classifieds section.
- Register using Google or email. It only takes a couple of minutes.
- Complete the listing and add photos: provide the garage's main specifications, the condition of the roof and doors, access details, and any known defects.
- Receive calls from buyers: after your listing has been reviewed and published, buyers will be able to see your contact details, including your phone number or Telegram.
The author also has a public page displaying all active listings. If additional promotion is needed, paid options are available, including highlighting the listing with color, pinning it to the top, automatic boosting, and featured placement on the homepage. These options help increase the listing's visibility but do not guarantee a sale.
What to Include in the Garage Description
Include the garage's actual specifications and supplement the photos with explanations of its condition. Buyers need to understand not only what the property looks like but also its practical features.
| What to Include | What to Write |
|---|---|
| Property type | The garage and its intended use |
| Location | The address or a clear landmark that you are willing to share publicly |
| Dimensions | Known dimensions or floor area, if verified |
| Roof | Type of roofing and noticeable condition-related features |
| Doors | Construction type, visible condition, and opening characteristics |
| Interior condition | Condition of the walls, floor, and ceiling, including any noticeable damage |
| Access | How to reach the garage and any restrictions buyers should know about |
| Additional features | Lighting, ventilation, and other features, if they are actually present |
| Sale terms | Important conditions and contact method |
Do not state specifications you are unsure about. If the exact dimensions are unknown, it is better to say they need to be confirmed than to publish approximate figures as exact measurements.
Mistakes That Make It Hard to Assess a Garage from Photos
The main mistakes are showing only the facade, hiding defects, taking photos in poor lighting, and failing to explain important property features.
Check your listing before publishing:
- Only one angle. Add photos of the roof, doors, and interior.
- Photos that are too dark. Retake detailed shots in adequate lighting.
- Glare on wet metal. Change the shooting angle or wait for the surface to dry.
- Leaves covering important areas. Clear accessible areas safely before taking photos.
- Defects concealed by objects or editing. Show the condition honestly and explain it in the description.
- Important details missing from the photos. Add shots of the ceiling, hinges, lock, and floor if their condition matters.
- Description contradicts the photos. Make sure the text accurately reflects the garage's visible condition.
FAQ: Frequently Asked Questions About Garage Photos
What photos are needed to sell a garage?
Take an overall exterior shot, photos of the doors, roof, interior, ceiling, walls, and floor. Show important defects separately.
Can I photograph a garage in overcast weather?
Yes. Soft daylight often helps prevent harsh shadows. The main thing is to ensure that the details are clear and easy to distinguish.
Should I photograph the roof from the inside?
Yes, if it is possible and safe. Photos of the ceiling and upper walls help show possible signs of leaks and visible damage.
How should I show rust on the garage doors?
Take an overall photo of the doors and separate close-ups of corroded areas. Do not use filters that change the color of the metal.
Should I remove leaves before taking photos?
Yes, if they block the doors, access route, or parts of the garage that can be inspected. Only work on the roof when safe conditions are in place.
Can I post a garage-for-sale listing on BRIX for free?
Yes. Register using Google or email on brix.uz/classifieds, complete the listing, and add photos. The listing is reviewed before publication.
When will buyers be able to see the seller's contact details?
After the listing is published, buyers will be able to see the author's contact details, including their phone number or Telegram.
How can I increase my listing's visibility?
BRIX offers paid promotional tools, including color highlighting, pinning the listing to the top, automatic boosting, and featured placement on the homepage. These options are designed to provide additional promotion for the listing.
Post Your Listing on BRIX for Free
Well-planned photos help buyers assess a garage and prepare for an inspection. Show the roof, doors, and interior without distortion, and include accurate specifications and details about the property's condition in the description.
To reach interested buyers, post your listing on brix.uz/classifieds.
- Register using Google or email in a couple of minutes.
- Complete the listing and add photos of the garage.
- Wait for the listing to be reviewed and published. Buyers will then be able to contact you using the details provided.
Posting a listing is free. If you need additional visibility, you can choose from the available paid promotional tools. Prepare your photos in advance and start with a clear, honest description of the garage.